
1. 라이브러리 정의
import pandas as pd
import numpy as np
import matplotlib.pyplot as plt

import os

import tensorflow
from tensorflow import keras
2. 데이터 확인
# 데이터 확인하기
data_path = "./cats_and_dogs/"

for idx in range(1,5):
  plt.subplot(2,2,idx)
  img = plt.imread(data_path + "cats/cat_" + f"{idx}.jpg")
  plt.imshow(img)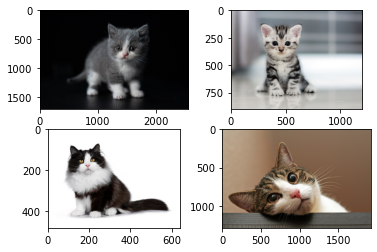
3. 이미지 데이터 전처리
- 각 이미지를 image.load_img를 통해 PIL.Image.Image 형태로 불러온다.
- image를 img_to_array를 통해 ndarray로 변환한다.
- x_train의 shape은 (이미지 수, 너비, 높이, 채널 수) 이다.
# 이미지 데이터 배열로 변환하기
x_train = []
y_train = []
for c in ['cats', 'dogs']:
  for filename in os.listdir(data_path + f'{c}/'):
    img = image.load_img(data_path + f'{c}/{filename}', target_size=(256,256))
    img = image.img_to_array(img)
    x_train.append(img)
    if c == 'cats':
      y_train.append(1)
    else:
      y_train.append(0)

x_train = np.array(x_train)
y_train = np.array(y_train)

print(x_train.shape)
print(y_train.shape)
(24, 256, 256, 3)
(24,)4. 모델 생성
- Sequential 형태로 모델 작성
- 2개의 layer, activation function은 ReLU
- 분류를 위한 1차원 데이터 변환 Flatten
- 이진 분류 결과를 위한 activation function인 sigmoid
# 모델 생성
keras.backend.clear_session()

model = keras.models.Sequential([
    keras.layers.Input(shape=(256,256,3)),
    keras.layers.Dense(64, activation='relu'),
    keras.layers.Dense(32, activation='relu'),
    keras.layers.Flatten(),
    keras.layers.Dense(1, activation='sigmoid')
])

model.summary()
Model: "sequential"
_________________________________________________________________
Layer (type) Output Shape Param #
=================================================================
dense (Dense) (None, 256, 256, 64) 256
dense_1 (Dense) (None, 256, 256, 32) 2080
flatten (Flatten) (None, 2097152) 0
dense_2 (Dense) (None, 1) 2097153
=================================================================
Total params: 2,099,489
Trainable params: 2,099,489
Non-trainable params: 0
_________________________________________________________________5. 모델 학습
- loss function은 binary_crossentropy
- model.fit()을 통해 학습 진행
model.compile(loss='binary_crossentropy', metrics='accuracy')
model.fit(x_train, y_train, epochs=30, verbose=1)
6. 결과 확인
- 최종 Accuracy 95.8%
Epoch 27/30
1/1 [==============================] - 0s 352ms/step - loss: 1597.0031 - accuracy: 0.5000
Epoch 28/30
1/1 [==============================] - 0s 374ms/step - loss: 2486.4636 - accuracy: 0.6250
Epoch 29/30
1/1 [==============================] - 0s 340ms/step - loss: 202.5248 - accuracy: 0.8750
Epoch 30/30
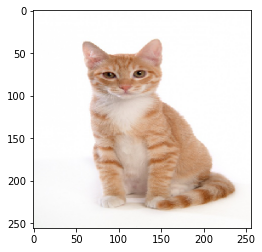
1/1 [==============================] - 0s 365ms/step - loss: 74.7255 - accuracy: 0.95831/1 [==============================] - 0s 36ms/step
prediction : cat
# 추가로 생각해볼 점
정확도가 95.8%인 모델을 사용할 수 있을까?
학습하는 이미지를 늘려 진행한다면, 정확도는 어떻게 될까?
loss가 줄어들면, accuracy도 반드시 줄어들까?
'ML_DL > MUJAKJUNG (무작정 시리즈)' 카테고리의 다른 글
| [Llama3 파인튜닝] 코드 업데이트 및 실험 2 (0) | 2024.12.25 |
|---|---|
| [Llama3 파인튜닝] 파인튜닝 코드 작성 및 실험 1 (2) | 2024.12.18 |
| [Streamlit] 앱 실행하기 (0) | 2024.10.11 |
| [OpenAI] OpenAI API 발급 및 request (0) | 2024.08.21 |
| 무작정 시리즈의 시작 (0) | 2022.10.06 |